Welcome to our comprehensive guide on building DIY interlocking retaining walls in Toronto! Retaining walls not only provide stability and structure to your property but also add visual appeal to your landscape. By choosing to build a retaining wall yourself, you can add value to your Toronto property while enjoying the satisfaction of creating something with your own hands.
In this article, we will guide you through the entire process of building your own retaining walls, from planning and selecting materials to construction and finishing touches. Our step-by-step instructions will make this DIY project an enjoyable and rewarding experience.
Let’s get started!
Key Takeaways:
- Building DIY retaining walls can add value to your Toronto property.
- Creating a retaining wall yourself can be a satisfying and enjoyable experience.
- Our comprehensive guide will provide step-by-step instructions for the entire DIY process.
- DIY retaining walls offer customization options and cost savings compared to hiring professionals.
- Proper planning, selection of materials, and maintenance are crucial for the longevity of your retaining wall.
Why Choose DIY Retaining Walls?
Are you considering adding a retaining wall to your Toronto property but unsure whether to hire professionals or take on a DIY project? Here are some of the benefits of opting for DIY retaining walls:
- Cost-effective: Perhaps the most significant advantage of DIY retaining walls is the cost savings. Hiring professionals can be expensive, so doing it yourself can help you save a considerable amount of money without sacrificing quality.
- Customization: DIY retaining walls allow for customization to fit your preferences and style. You can choose the materials, colors, and textures that best suit your property and enhance its overall aesthetic.
- Sense of accomplishment: There’s nothing quite like the feeling of completing a project with your own two hands. Building a retaining wall yourself can be a fun and rewarding experience that gives you a sense of pride and accomplishment.
By choosing to build a DIY retaining wall, you can save money, customize the design, and enjoy the satisfaction of completing the project yourself. Plus, you’ll have a beautiful and functional addition to your Toronto property that adds value and curb appeal.
Planning Your DIY Retaining Walls
Before starting your DIY project, it’s essential to plan thoroughly. With proper planning, you can save time, money, and avoid unnecessary frustration. Let’s walk through the key factors to consider when planning your DIY retaining walls.
Measurements
The first step is to measure your space accurately. This will help you determine the materials you need, the amount of excavation required, and how much backfill will be necessary. Measure the length, width, and height of the area where you plan to build the retaining wall. Use the measurements to calculate the number of interlocking blocks required for the project.
Permits
Building a retaining wall in Toronto may require permits. The regulations differ based on the height and location of the wall. Before starting the project, check with your local government to obtain any necessary permits and ensure your project meets all regulations. Failure to obtain proper permits can lead to fines and the removal of your retaining wall.
Drainage
Another crucial factor to consider is drainage. Poor drainage can cause water buildup behind your retaining wall, leading to instability and damage over time. Consider installing drainage pipes and selecting appropriate backfill materials to promote proper drainage. Proper compaction is also essential to prevent shifting or settling of the retaining wall.
By carefully planning your DIY retaining walls, taking accurate measurements, obtaining necessary permits, and addressing drainage, you set yourself up for success. With the right preparation, you can create a durable and long-lasting retaining wall that enhances the beauty and value of your Toronto property.
Choosing the Right Materials
Choosing the right materials for your DIY retaining wall is crucial for its durability and success. We recommend using interlocking blocks as they are easy to work with and come in a variety of styles and colours, allowing you to customize your wall to your liking. Additionally, interlocking blocks create a strong and stable structure, ensuring your wall will last for years to come.
Proper drainage is also essential for your retaining wall. We suggest using drainage materials such as gravel or perforated pipes to prevent water from building up behind the wall, which could cause damage over time. Adding geotextile fabric behind the wall can also aid in drainage and prevent soil erosion.
Make sure to select materials that are appropriate for your wall’s height and weight-bearing capacity. Consider consulting with a professional if you’re unsure what materials will best suit your DIY project.
Preparing the Site
Before we start building our DIY interlocking retaining walls in Toronto, we need to properly prepare the site. This includes measuring the area, excavating the ground, and leveling it. Site preparation is crucial for a stable and long-lasting retaining wall.
Measuring the Area
The first step in preparing the site is measuring the area where you plan to build your retaining wall. This will help you determine the amount of materials you need to complete the project. Measure the length, width, and height of the area and calculate the total volume.
Excavating the Ground
Next, we need to excavate the ground. This involves removing any vegetation, rocks, or debris from the area where we plan to build the retaining wall. Use a shovel or excavator to dig a trench for the foundation of the wall. The trench should be at least 6 inches deep and the width should be twice the width of the interlocking blocks you plan to use.
Leveling the Ground
Once the excavation is complete, it’s time to level the ground. This is essential to ensure that the retaining wall is stable and sturdy. Use a leveling tool to ensure that the ground is even and flat.
Site preparation is an essential part of building DIY interlocking retaining walls in Toronto. By measuring the area, excavating the ground, and leveling it properly, we can ensure that our retaining wall will last for years to come.
Building the Foundation
Now that you have your site prepared, it’s time to start building the foundation of your retaining wall. The foundation is essential in ensuring the stability of the wall and preventing any future shifts or damages.
Foundation: The first step is to choose the right base material. We recommend using a crushed stone base due to its excellent drainage capabilities. Compact the base material with a plate compactor to ensure it’s level and well-supported throughout the entire length of the wall.
Compacting: It’s important to compact the base material well to prevent any future settling. We recommend using a plate compactor for this step, as it provides the necessary vibration to ensure the material is compacted properly.
Leveling: Make sure your foundation is level by using a straight piece of wood or a level tool. Any slopes or unevenness can cause the retaining wall to shift or fail over time.
Once you’ve completed the foundation, you’re ready to start building your DIY retaining wall!
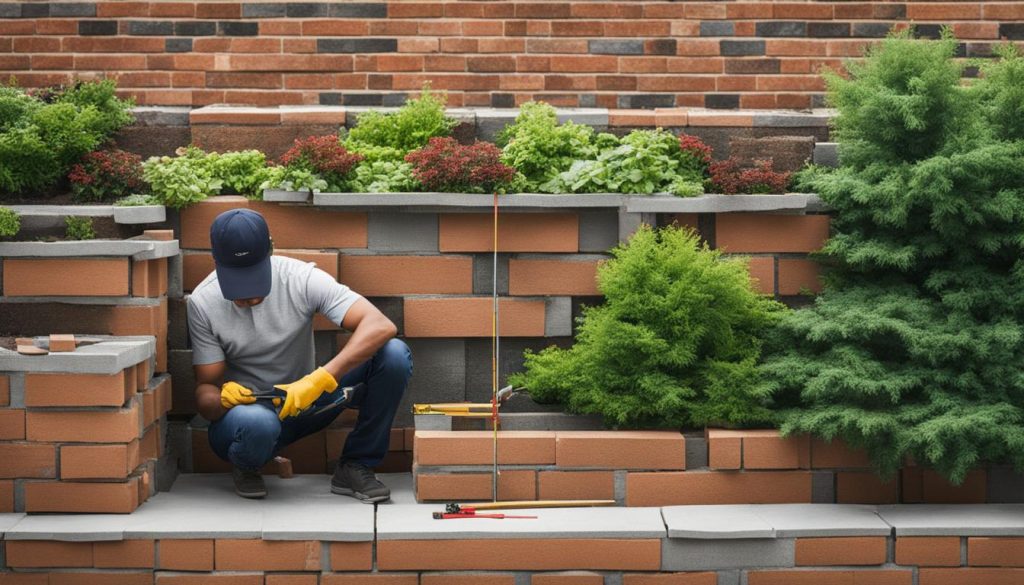
Constructing the Retaining Wall
Now that you have your foundation in place, it’s time to start building your DIY interlocking retaining wall. Begin by laying out your first course of interlocking blocks along the foundation.
When choosing your interlocking pattern, consider the wall height and the specific block you are using. Some patterns work better for taller walls, while others are better suited for shorter walls. Always refer to the manufacturer’s recommendations for the best interlocking pattern for your specific block.
As you stack your blocks, be sure to use adhesive to secure them in place. This will ensure that your wall remains stable and secure over time.
Remember to check your wall for level as you go along. A level wall will not only look better, but it will also function properly to hold back soil and prevent erosion.
Continue building your wall by repeating the pattern and using adhesive as needed. Take your time and double-check your work along the way to ensure that your wall is turning out the way you envisioned it.
As you reach the end of your wall, you may need to cut blocks to fit. Use a saw or chisel to carefully cut the blocks to the right size and shape, ensuring a snug and secure fit.
Once you have completed your retaining wall, step back and admire your hard work! Your new wall will not only add function to your landscape but also improve its appearance.
Adding Drainage and Backfill
Proper drainage is crucial for preventing water buildup behind your retaining wall. Without it, your wall may become unstable and may not last as long as it should. Adding drainage pipes is a simple solution that will save you a lot of trouble in the long run. Position the pipes at the base of your wall, allowing water to flow freely out of the area.
The backfill material you choose is just as important as the drainage pipes. Use clean stone or gravel, as they allow water to flow through easily. Avoid using soil, as it retains water and can cause hydrostatic pressure to build up behind your wall. Hydrostatic pressure occurs when water accumulates behind your wall and can cause it to shift or fail altogether.
After filling your retaining wall with backfill material, it’s important to compact it properly. Compaction ensures that your wall is stabilized, making it more durable and less likely to shift or fail. Use a mechanical compactor for larger walls, or a hand-held one for smaller areas. Work your way from the bottom to the top, being sure to compact every layer properly.
Choosing the Right Backfill Material
The backfill material you choose can have a significant impact on the longevity of your retaining wall. As mentioned earlier, clean stone or gravel are excellent choices for their ability to allow water to flow through easily. They also provide excellent drainage and support, making them ideal for larger walls.
Avoid using soil, as it retains water and can lead to hydrostatic pressure buildup. Additionally, if you use soil, it’s important to ensure that it is free of roots and other debris that can decompose and cause shifting within your wall.
Choosing the right backfill material is essential to the stability and longevity of your retaining wall. Be sure to take the time to make the right choice and to properly compact your material to ensure your wall is stable and long-lasting.
Finishing Touches and Aesthetics
After all the hard work, it’s time to add those finishing touches to your DIY interlocking retaining wall in Toronto! These final touches not only add to the aesthetic appeal of the wall but also enhance the overall look of your landscape. Let’s dive in!
Design Options
There are several design options when it comes to adding finishing touches to your retaining wall. One popular option is to incorporate planters on top of the wall to add greenery and color to your landscape. You can also add decorative elements such as lights or sculptures to create a unique and personalized touch. To further enhance the aesthetics of your wall, consider adding a capstone to provide a clean and polished look.

Landscape Design
When choosing the design for your retaining wall, it’s important to consider how it fits into the overall design of your landscape. The wall should complement the surrounding elements and not stand out as an eyesore. Consider factors such as the color scheme of your home and existing outdoor space, as well as the overall style you are trying to achieve. You can consult with a landscape designer to help bring your vision to life.
Maintenance Tips
To keep your retaining wall looking its best, it’s important to follow a few maintenance tips. Regularly inspect the wall for any cracks or signs of damage, and address any issues as soon as possible. It’s also important to keep the area around the wall free of debris and to trim any vegetation that may encroach on the wall. By following these simple tips, your DIY retaining wall in Toronto will look great for years to come.
Maintenance and Longevity
Now that your DIY retaining wall is complete, it’s important to maintain it to ensure its longevity and stability. Follow these maintenance tips to keep your retaining wall looking and functioning its best for years to come.
Regular Inspections
Regular inspections are crucial for identifying any potential issues before they become larger problems. We recommend inspecting your retaining wall at least twice a year, ideally in the spring and fall. During your inspection, look for any cracks, bulges, or signs of movement. Address any issues promptly to prevent further damage.
Repairs
Minor repairs can often be handled on your own with the right tools and materials. Small cracks can be filled with a concrete patching compound, while larger cracks may require the replacement of the affected blocks. If you notice any signs of significant damage, such as leaning or bowing walls, it’s important to call a professional to evaluate the situation.
Preventative Measures
There are several preventative measures you can take to minimize the need for repairs in the future. First, ensure that your retaining wall has proper drainage and that water is not pooling behind it. This can lead to excess pressure on the wall and compromise its stability. Additionally, be careful when mowing or using other landscaping equipment near the wall to prevent accidental damage.
Image of a person using a level to inspect the stability of their retaining wall.
Enhancing Your Toronto Property’s Value
Now that your DIY interlocking retaining wall project is complete, you have not only added functional benefits to your property but also enhanced its value and curb appeal. The investment you made in building the wall yourself will pay off in the long run as it increases your property’s overall worth.
The retaining wall serves a practical purpose by preventing soil erosion and providing support to land on sloped surfaces. The addition of the interlocking wall also creates a well-defined and attractive border that complements the surrounding landscape. It adds a charming touch and gives your property a welcoming appearance.
Not only does the retaining wall increase your property’s aesthetic appeal, but it also proves to be a smart investment in the long run. The value of your property increases with the addition of functional and attractive features such as a retaining wall. It makes your property more attractive to potential buyers and adds value to your home should you decide to sell it.
Invest in Your Property Today
By building your DIY interlocking retaining wall, you have added both functional and aesthetic value to your Toronto property. It serves as an investment in your home and enhances its overall worth. Start planning your DIY project today and enjoy the benefits that your new retaining wall will bring!
If you have any questions about our interlocking design and construction services at Interlocking Toronto, don’t hesitate to ask. Our team specializes in various interlocking projects, including backyard, driveway, patio, porch, walkway, and pool installations.